Areas & Positions
Set up the physical layout of your haunted attraction. Areas represent zones and positions represent the roles within each zone.
Before You Start
There are no prerequisites for this guide. Areas and positions are typically the very first thing you configure in Graveyard Shift because every other feature -- events, scheduling, availability tracking -- builds on top of your area/position layout.
Before you begin, it helps to have a mental model of the two concepts:
- Areas are the physical zones of your attraction. Think of them as the distinct sections a guest walks through: "Haunted Forest", "Graveyard", "Asylum Wing", "Carnival Midway".
- Positions are the roles people fill within each area. A single area might need a "Scare Actor", a "Greeter", a "Queue Line Monitor", and a "Safety Lead".
Real-world example: A medium-sized haunt might have five areas (Front Gate, Haunted Forest, Graveyard, Asylum, Gift Shop Exit) with three to six positions in each. The Front Gate area could have "Ticket Scanner", "Greeter", and "Queue Line Monitor". The Haunted Forest area could have "Scare Actor (Tree Line)", "Scare Actor (Bridge)", "Fog Machine Operator", and "Safety Lead".
Creating Areas
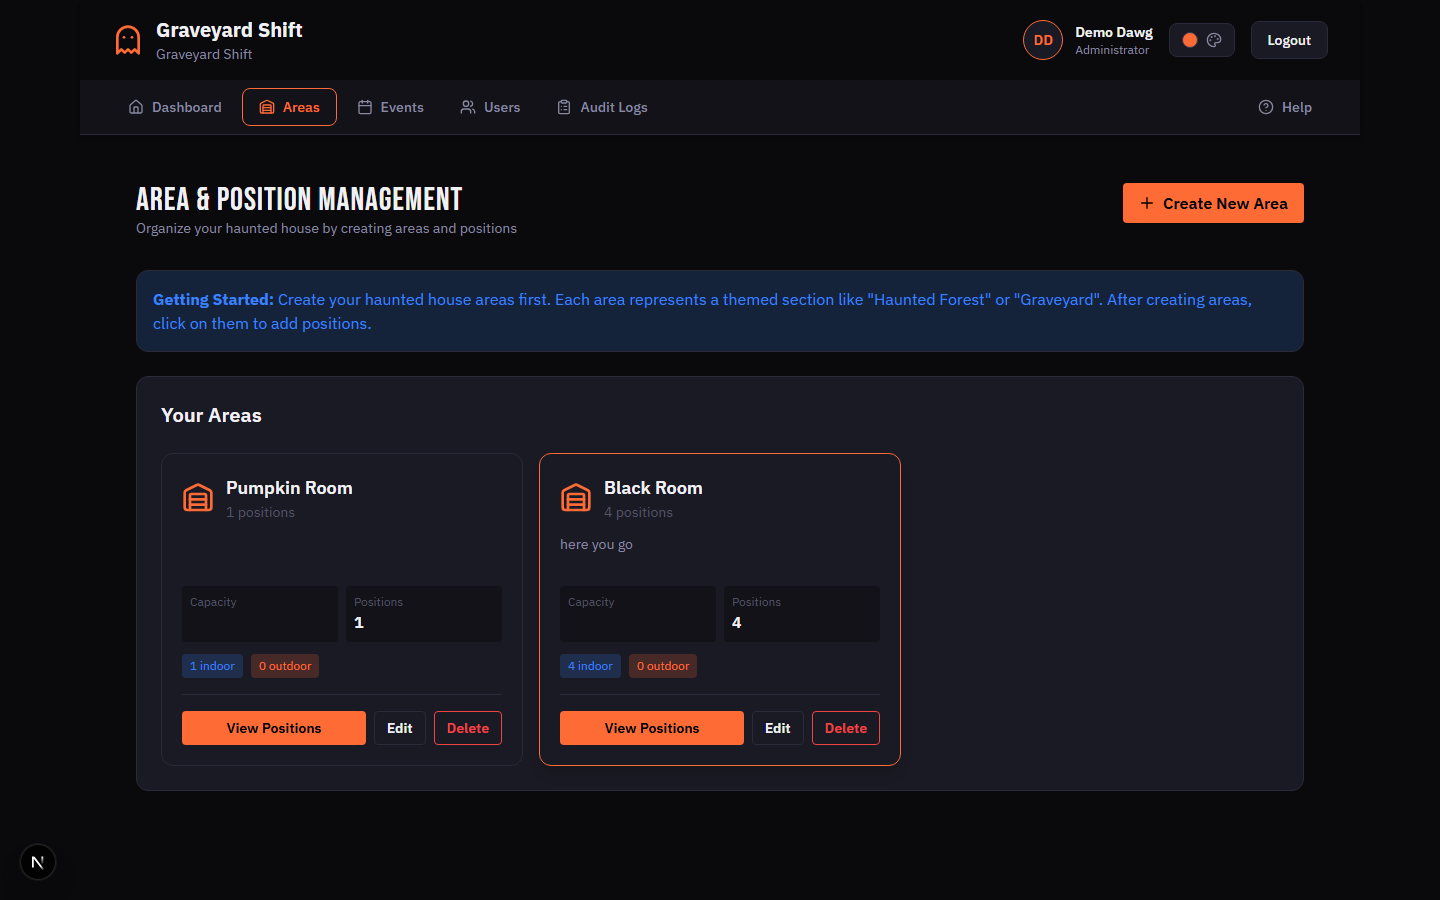
Areas are the top-level organizational unit. Each area represents a physical zone of your attraction. Follow these steps to create your first area.
Navigate to Areas & Positions
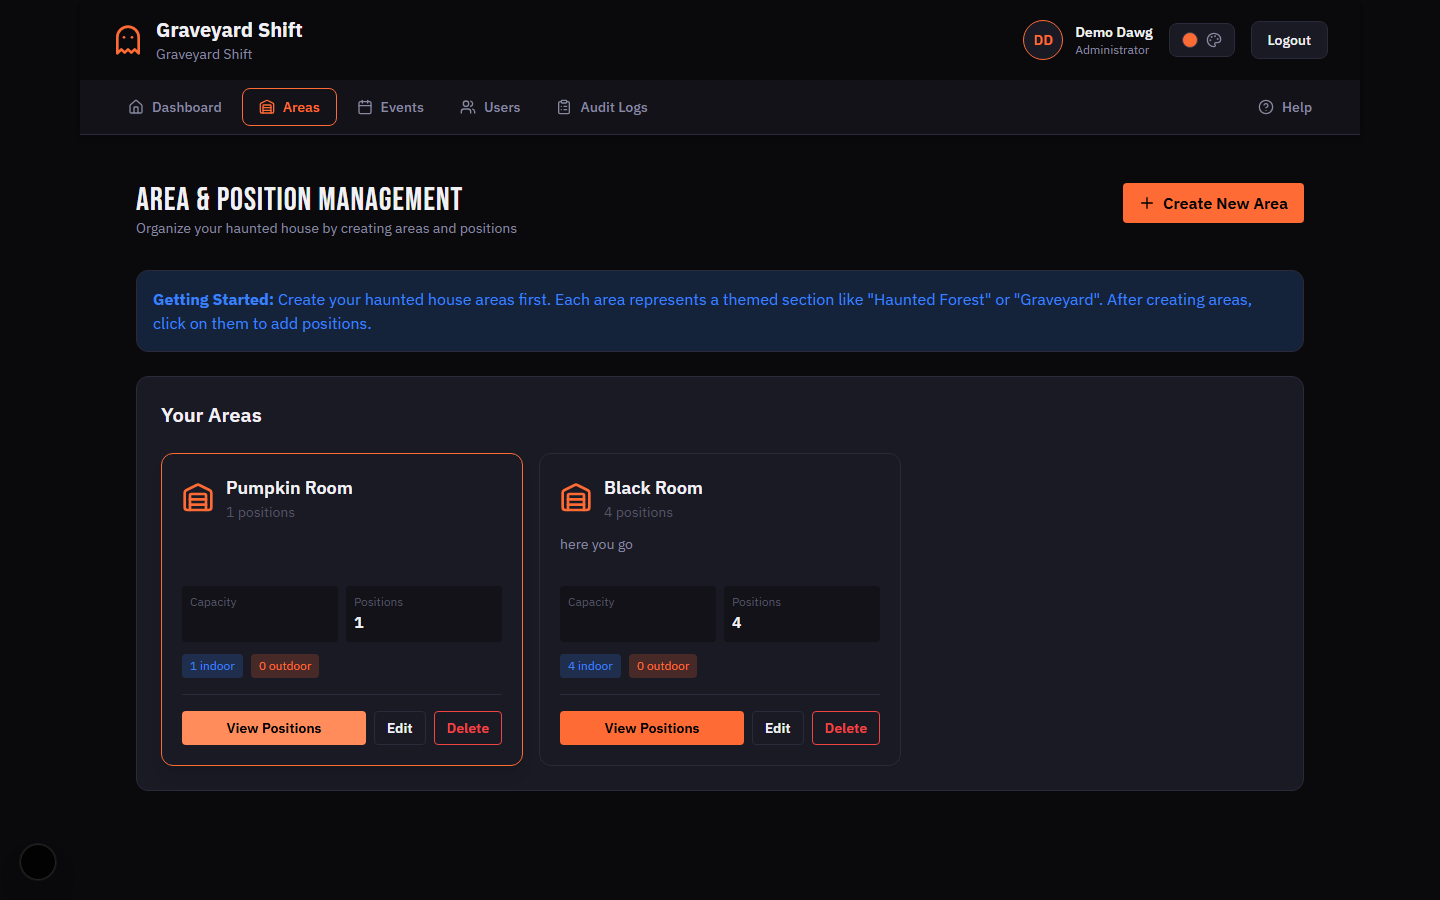
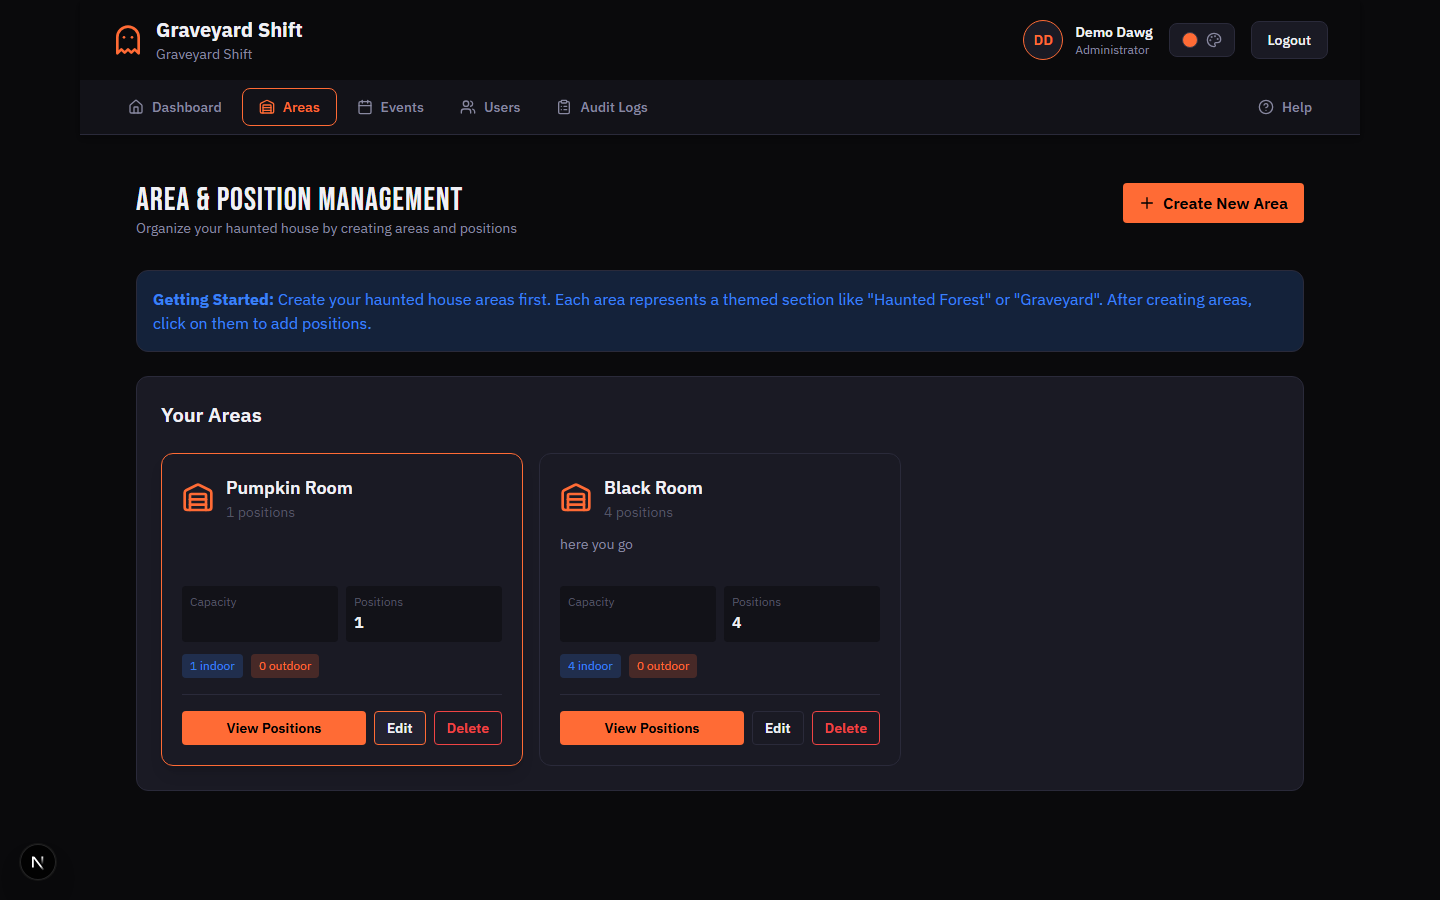
From the Admin Dashboard, locate the Admin Tools section and click Areas & Positions. This opens the areas list view where all of your attraction zones are displayed as cards.
Click Create New Area
Click the Create New Area button in the page header. A modal dialog opens with the area creation form.
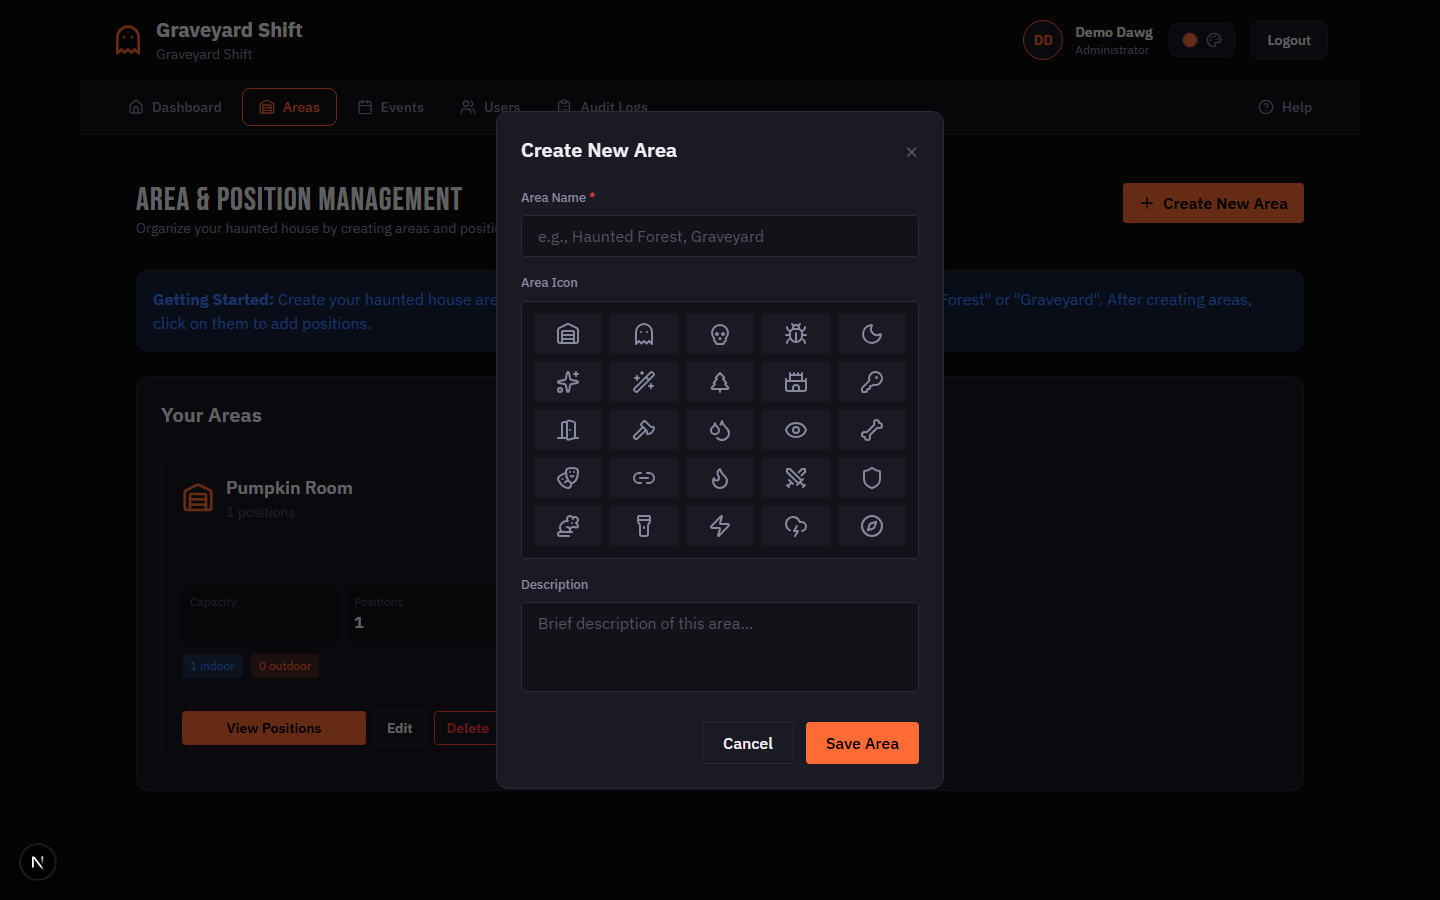
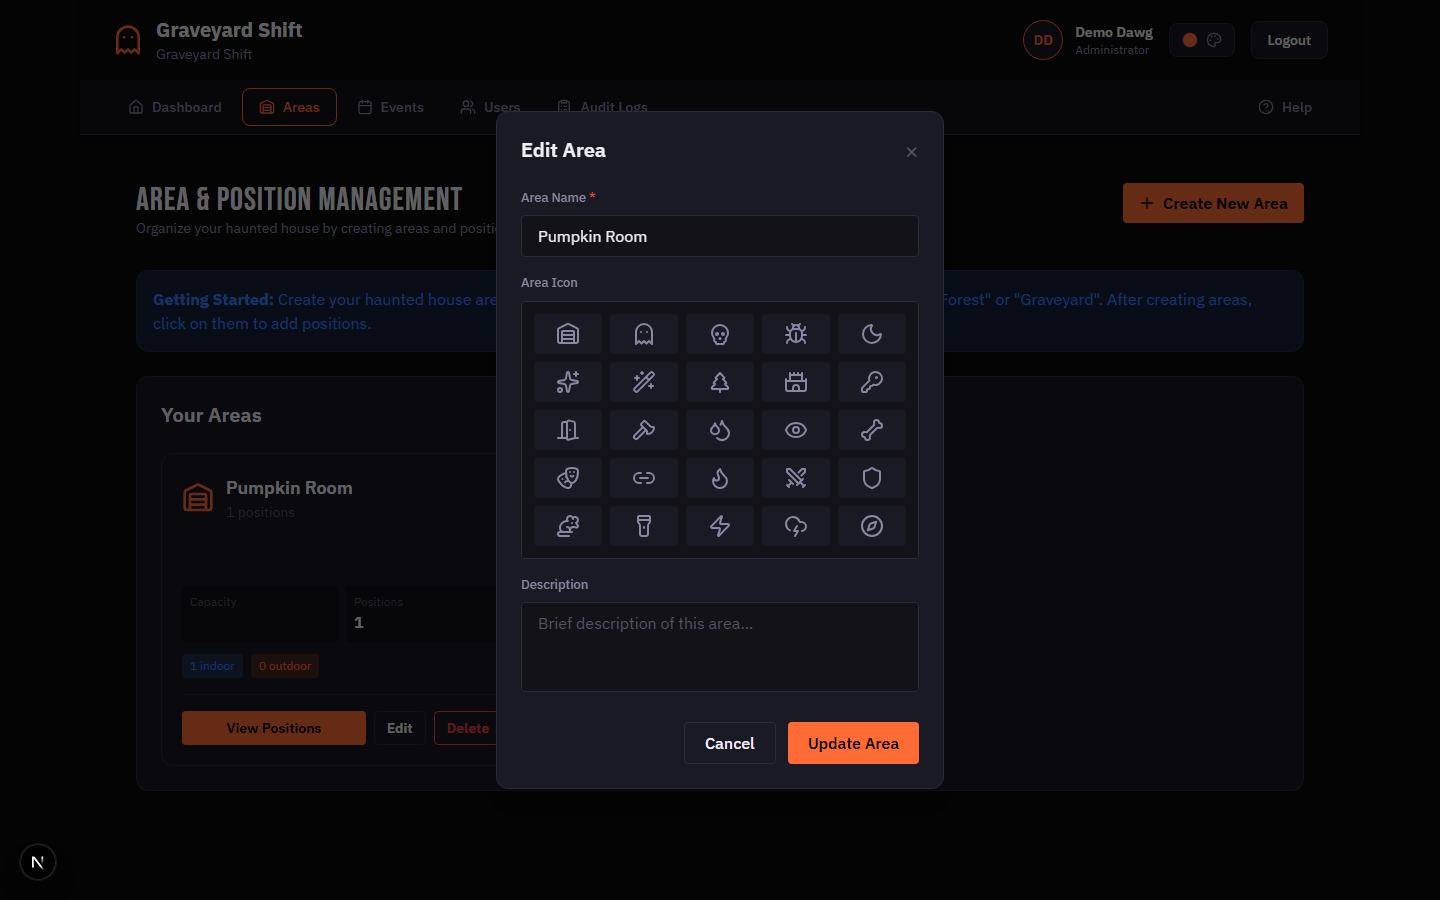
Fill in the area details
Enter a name for the area (required). Optionally select an icon to visually distinguish this area on the scheduling grid and area cards. Add a description if you want to note details like the area location or theme for your team.
Click Save Area
Click Save Area to create the area. It appears immediately in the areas list. You can now add positions to it.
Area Fields
| Field | Required | Description |
|---|---|---|
Name | Yes | A unique name for this area within your company. Examples: "Haunted Forest", "Graveyard", "Asylum Wing". |
Icon | No | An icon displayed on the area card and scheduling grid to help visually identify the area at a glance. |
Description | No | Free-text notes about the area. Useful for documenting the physical location, theme details, or setup instructions for your team. |
Managing Positions
Positions live inside areas. Each position represents a specific role that needs to be staffed on a show date. You can add as many positions as you need to each area.
Open the area detail view
On the area card, click View Positions. This opens the area detail page showing all positions currently assigned to that area.
Click Add Position
Click the Add Position button to open the position creation form in a modal.
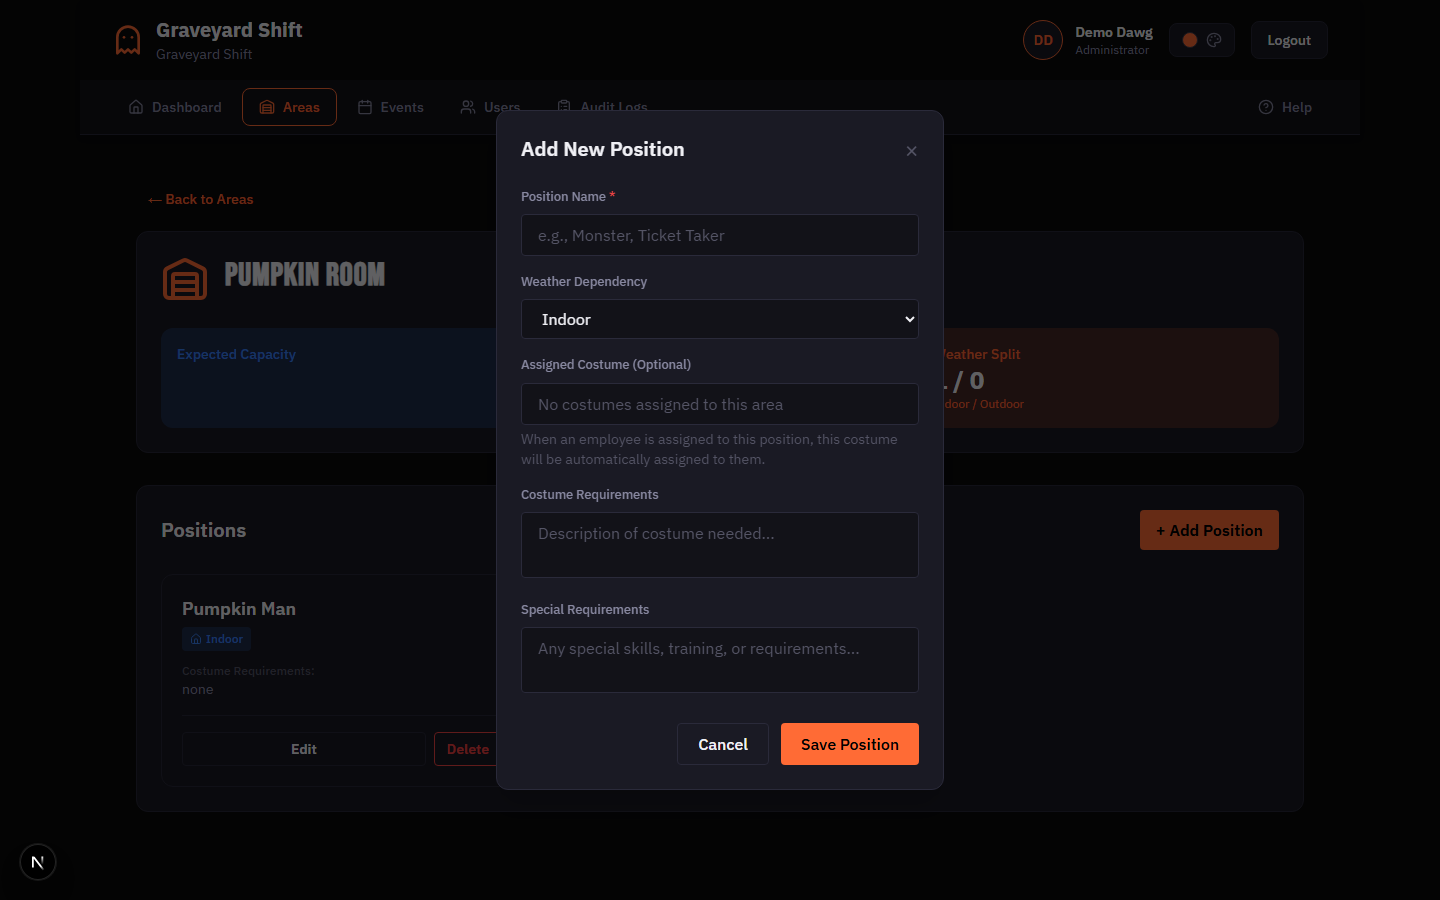
Fill in the position details
Enter the position name (required). Select whether this position is indoor or outdoor using the weather dependency selector. Optionally specify a costume, costume requirements, or any special requirements for the role.
Click Save Position
Click Save Position to add it to the area. The position now appears in the area detail view and will be available on the scheduling grid when this area is attached to an event.
Position Fields
| Field | Required | Description |
|---|---|---|
Name | Yes | The role name for this position. Examples: "Scare Actor", "Greeter", "Queue Line Monitor", "Safety Lead". |
Weather Dependency | No | Whether this position is Indoor or Outdoor. Outdoor positions can be flagged during inclement weather so admins can make scheduling adjustments. |
Costume | No | The costume associated with this position. Links to the costume management system if a specific costume is required. |
Costume Requirements | No | Free-text description of costume specifications when a specific costume record is not needed. Examples: "All black clothing", "Victorian-era dress". |
Special Requirements | No | Any additional requirements for this position, such as physical abilities, certifications, or minimum experience. Visible to admins during scheduling. |
Editing and Deleting
Editing Areas and Positions
To edit an area, click the Edit button on the area card. The edit modal opens pre-filled with the current values. Make your changes and click Save Area. The same flow applies to positions: click Edit next to the position name in the area detail view, update the fields, and click Save Position.
Edits take effect immediately. If you rename an area or position, the new name is reflected everywhere it appears -- on the scheduling grid, employee dashboards, and reports.
Deleting Areas and Positions
To delete an area or position, click the Delete button. A confirmation dialog asks you to verify the action. Deletions are permanent and cannot be undone.
Import and Export
The import/export feature lets you save your entire area and position layout as a JSON file and restore it later. This is especially useful for carrying your configuration from one season to the next or replicating a layout across multiple venues.
Exporting Areas
Click the Export button in the page header. A JSON file is downloaded containing all areas and their positions. The file preserves every field -- names, descriptions, icons, weather dependencies, costume requirements, and special requirements.
Importing Areas
Click the Import button in the page header and select a previously exported JSON file. A preview dialog shows the number of areas and positions that will be imported. The import process skips any areas whose names already exist in your account to avoid duplicates. After the import completes, a results summary shows how many areas and positions were created and how many were skipped.
Best Practices
- Name areas by physical location. Use names your staff already uses on-site. If everyone calls the back section "The Swamp", name the area "The Swamp" -- not "Area 7" or "Zone B". Familiar names reduce confusion on show nights.
- Use descriptive position names. "Scare Actor (Bridge)" is more useful than "Actor 2". When an employee checks their schedule, the position name tells them exactly where to go and what to do.
- Set weather dependency for outdoor positions. Marking positions as Indoor or Outdoor allows the scheduling view to flag outdoor roles when bad weather is expected. This makes last-minute reassignments faster and safer.
- Keep positions consistent across events. If "Scare Actor" appears in the same area every season, keep the name identical. This makes year-over-year reporting more meaningful and lets employees recognize familiar roles.
- Use import/export for multi-venue operations. If you run several haunted attractions, export the area layout from one venue and import it into another as a starting point. Adjust names and positions as needed rather than building from scratch.
Troubleshooting
Cannot delete an area
This happens when one or more positions in the area have active schedule assignments. Open the area, check each position for assigned employees, and remove or reassign them. Once all positions are clear, delete the positions first, then delete the area.
Area name already exists
Area names must be unique within your company. If you see this error when creating or renaming an area, choose a different name. Check the areas list to find the existing area with that name -- you may want to edit it instead of creating a duplicate.
Positions not showing on the scheduling grid
Positions only appear on the scheduling grid when their parent area is attached to the event you are scheduling. Go to Event Management, edit the event, and verify that the area is checked in the area selection list. If the area is not selected, the positions in that area will not appear on the scheduling grid for that event.
Import skipped everything
The import process skips areas whose names already exist in your account. If every area in the file was skipped, it means all of those area names are already present. This is expected when re-importing a file you already imported. If you intended to replace existing areas, delete them first and then run the import again.