Registration & Onboarding
Create your employee account through the 4-step registration wizard, wait for admin approval, and get started with your first login.
Before You Start
To register as an employee, you need a registration link from your organization. This link takes you to the Graveyard Shift registration page where you will complete a 4-step wizard. Have the following information ready before you begin:
- Personal details -- your full name, email address, phone number, birth date, and mailing address.
- Emergency contact -- the name, phone number, and relationship of someone who can be reached in an emergency.
- A secure password -- at least 8 characters with at least one uppercase letter, one lowercase letter, and one number.
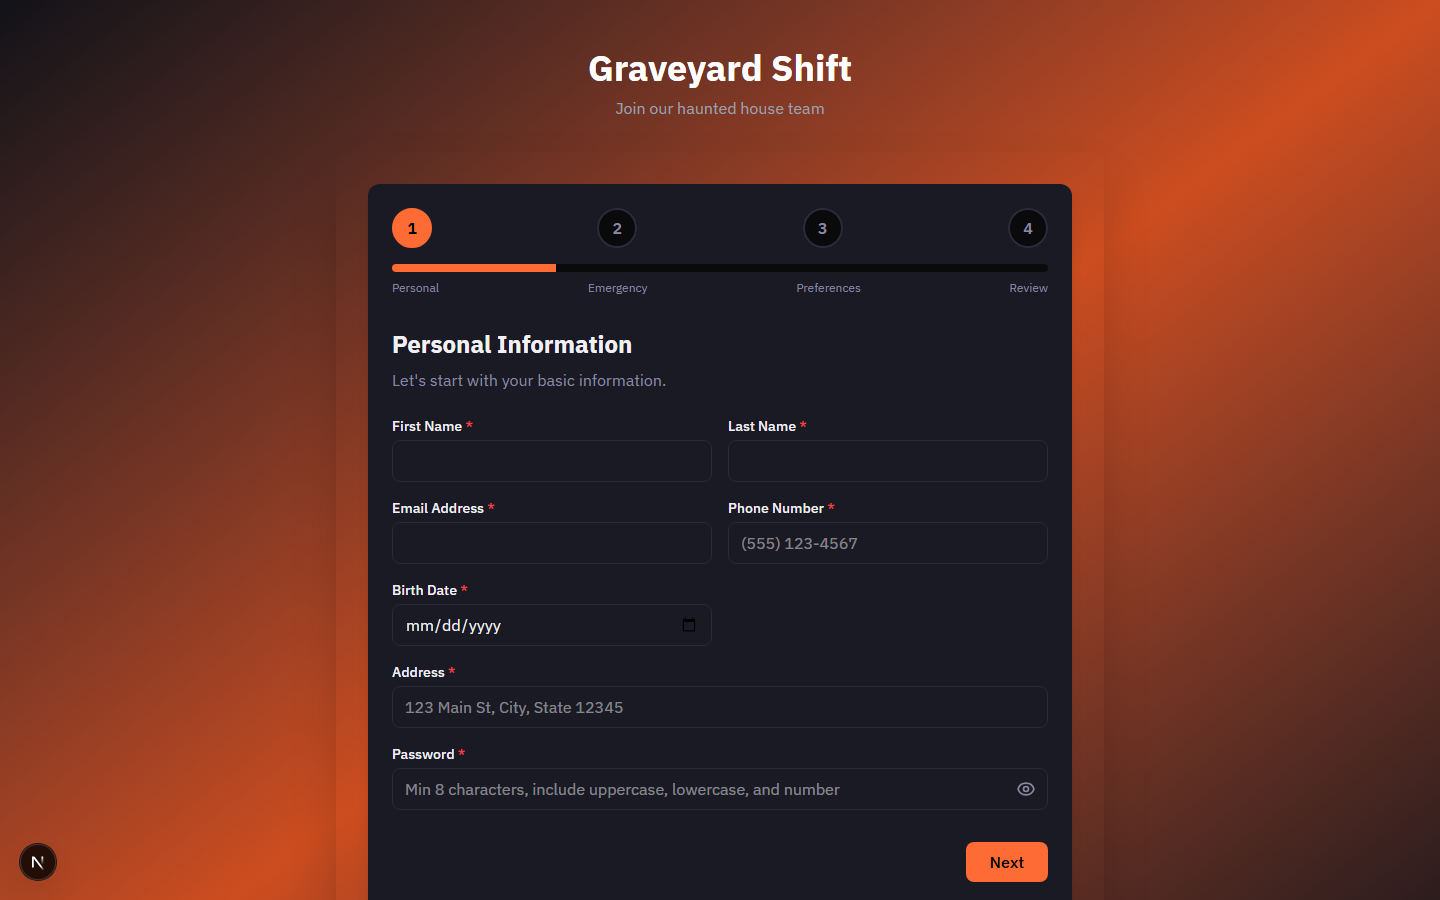
The 4-Step Registration Wizard
The registration wizard guides you through four steps. A progress bar at the top shows numbered circles for each step -- completed steps display a checkmark, the current step is highlighted, and future steps are dimmed. Labels below the progress bar read: Personal, Emergency, Preferences, and Review.
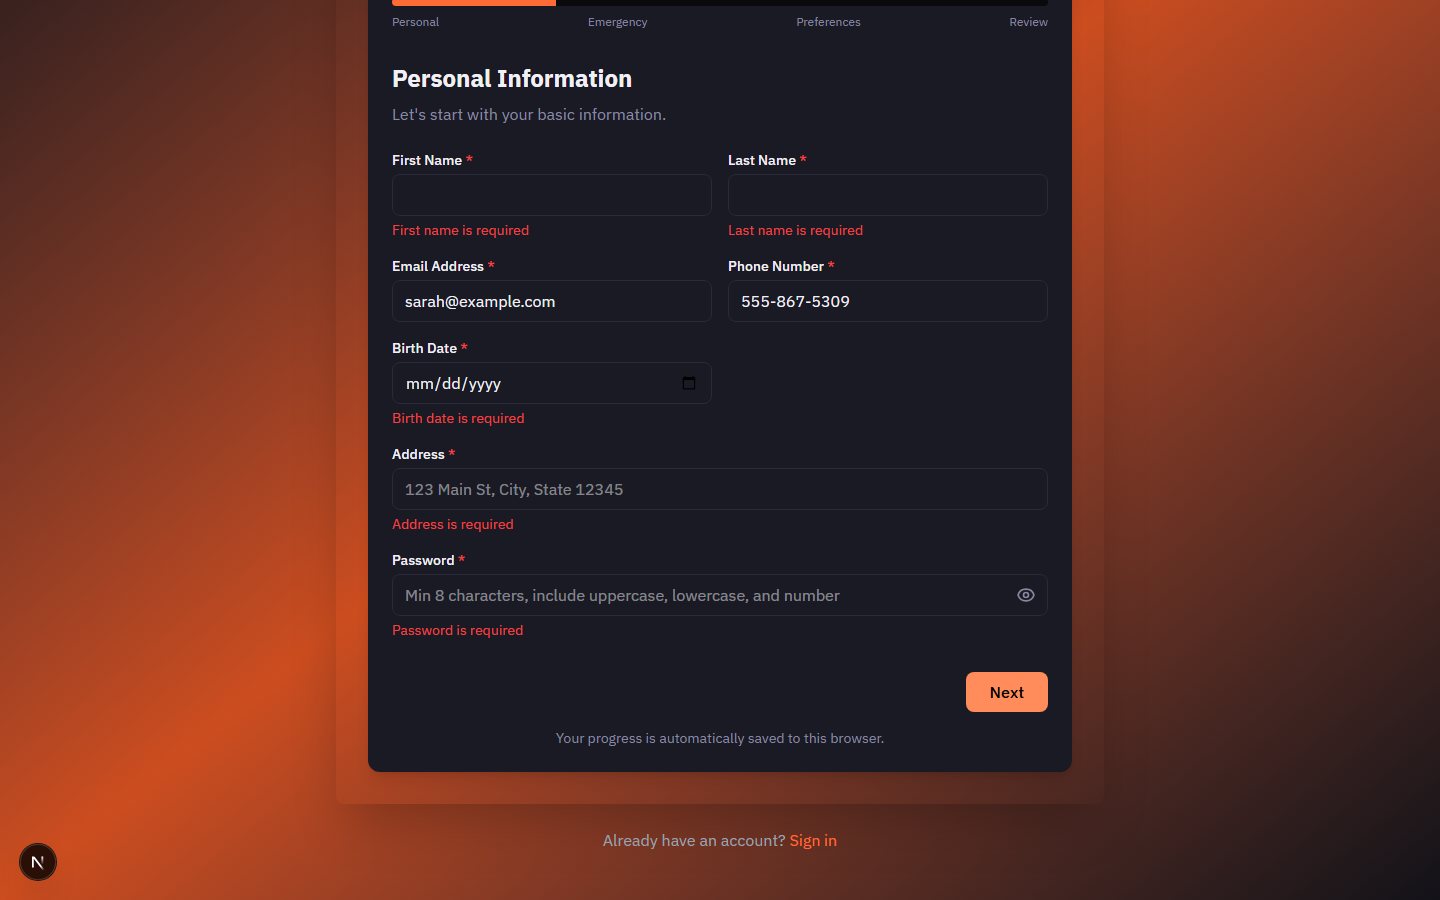
Step 1: Personal Information
Enter your first name, last name, email address, phone number, birth date, address, and a password. All fields marked with a red asterisk are required. Your password must be at least 8 characters and include at least one uppercase letter, one lowercase letter, and one number. You must be at least 16 years old to register.
Step 2: Medical and Emergency Information
Provide an emergency contact name, phone number, and their relationship to you (parent, spouse, sibling, child, friend, or other). Optionally, list any allergies, medical conditions, or current medications. A privacy notice at the top of this section explains that medical information is kept confidential and only used for safety purposes during events.

Step 3: Preferences and Communication
Select your previous acting or performance experience level (none, beginner, intermediate, or advanced). Then choose at least one communication preference: email notifications, SMS text messages, or shift reminders. At least one notification method must be enabled to proceed.

Step 4: Review and Submit
The final step displays a summary of everything you entered across the previous three steps: your personal information, emergency contact details, and preferences. Review all fields carefully. If anything is incorrect, click the Previous button to go back and make corrections. When everything looks right, click Submit Registration to complete the process.
Previous button. Your entries on later steps are preserved when you go back, so you will not lose any work.What Happens After Submission
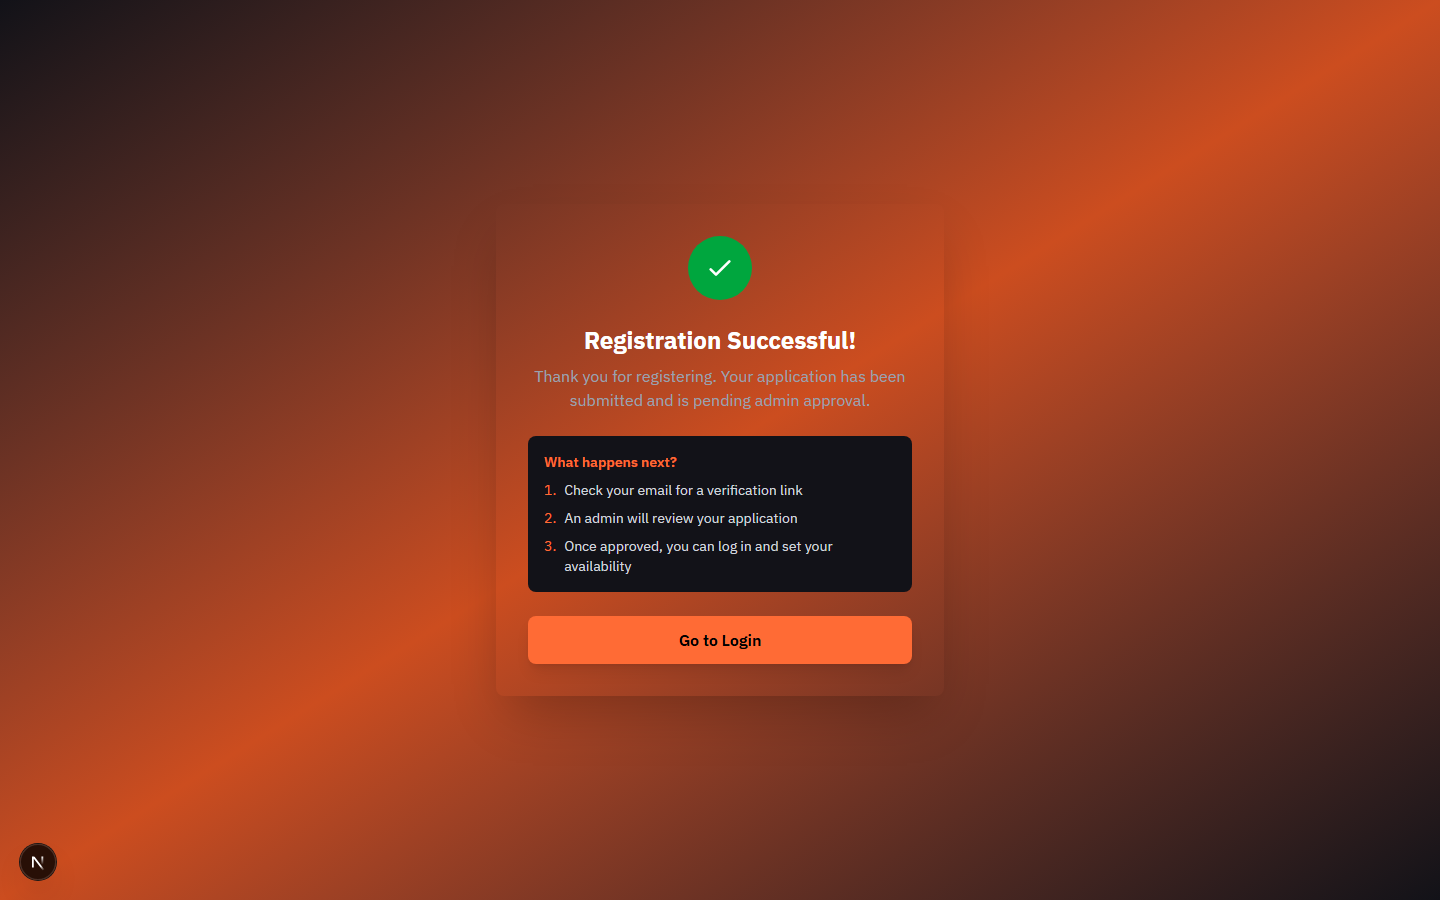
Submitting your registration does not immediately give you access to the application. Your registration enters an approval queue where an admin reviews it before granting access.
Registration confirmation
After submitting, you see a success message: "Registration successful! Awaiting admin approval." Your registration form data is cleared and saved drafts are removed from your browser. You are redirected to a success page.
Admin review and approval
Your admin receives a notification about your registration and reviews your information. They will either approve or reject your application. This process may take anywhere from a few hours to a few days depending on your organization.
Approval notification
When your admin approves your registration, you receive a notification (via your chosen communication preferences). You can then log in using the email and password you created during registration.
Setting Up After Approval
Once your admin approves your registration, you are ready to log in and start using Graveyard Shift. Here is what to do on your first visit.
Log in for the first time
After approval, navigate to the login page and enter the email and password you created during registration. You will be taken to your Employee Dashboard.
Explore your dashboard
Your dashboard is your home base. See the My Dashboard guide for a full walkthrough of the Quick Actions, Time Clock, Hours Worked, and My Schedule cards. Take a moment to familiarize yourself with the layout.
Set your availability
If events are available, use the Set Availability quick action to mark which dates you can work. See the Setting My Availability guide for step-by-step instructions. Submitting availability early gives your admin the best chance of assigning you to the shifts you prefer.
For a full overview of your dashboard layout and features, see the My Dashboard guide. For availability instructions, see Setting My Availability.
Registration Form Details
Password Requirements
Your password must meet all three of the following criteria: at least 8 characters long, contains at least one uppercase letter and one lowercase letter, and contains at least one number. The password field includes a show/hide toggle so you can verify what you have typed.
Medical Information Privacy
The allergies, medical conditions, and medications fields on Step 2 are optional. Any information you provide is kept confidential and used only for safety purposes during events. If you prefer not to share medical details during registration, you can leave these fields blank and discuss them privately with your admin later.
Notification Preferences
On Step 3, you must enable at least one notification method: email, SMS text messages, or shift reminders. These preferences determine how you receive scheduling updates, availability reminders, and other important messages from your admin. You can update these preferences after registration by contacting your admin.