Messaging & Notifications
Communicate with your staff via email and SMS. Send instant messages, schedule future deliveries, and configure automated reminders for shifts and events.
Before You Start
There are no strict prerequisites for sending messages, but you will get the most out of this feature once you have employees registered and approved in the system. Employees must have an approved application status to appear in recipient lists.
Graveyard Shift supports two delivery channels:
- Email -- sent to the email address on the employee's identity account. Supports full HTML formatting with subject lines.
- SMS -- sent to the phone number on the employee's profile. Only delivered to employees who have opted in to SMS notifications.
The overall flow is: compose a message, select one or more recipients (individually or by group), choose which channels to use, and then either send immediately or schedule for a future date and time.
Composing a Message
The Compose Message tab is where you draft and send messages to your staff. Follow these steps to send your first message.
Open the Messaging page
From the Admin Dashboard, navigate to the Messaging & Notifications page. The page opens on the Compose Message tab by default.

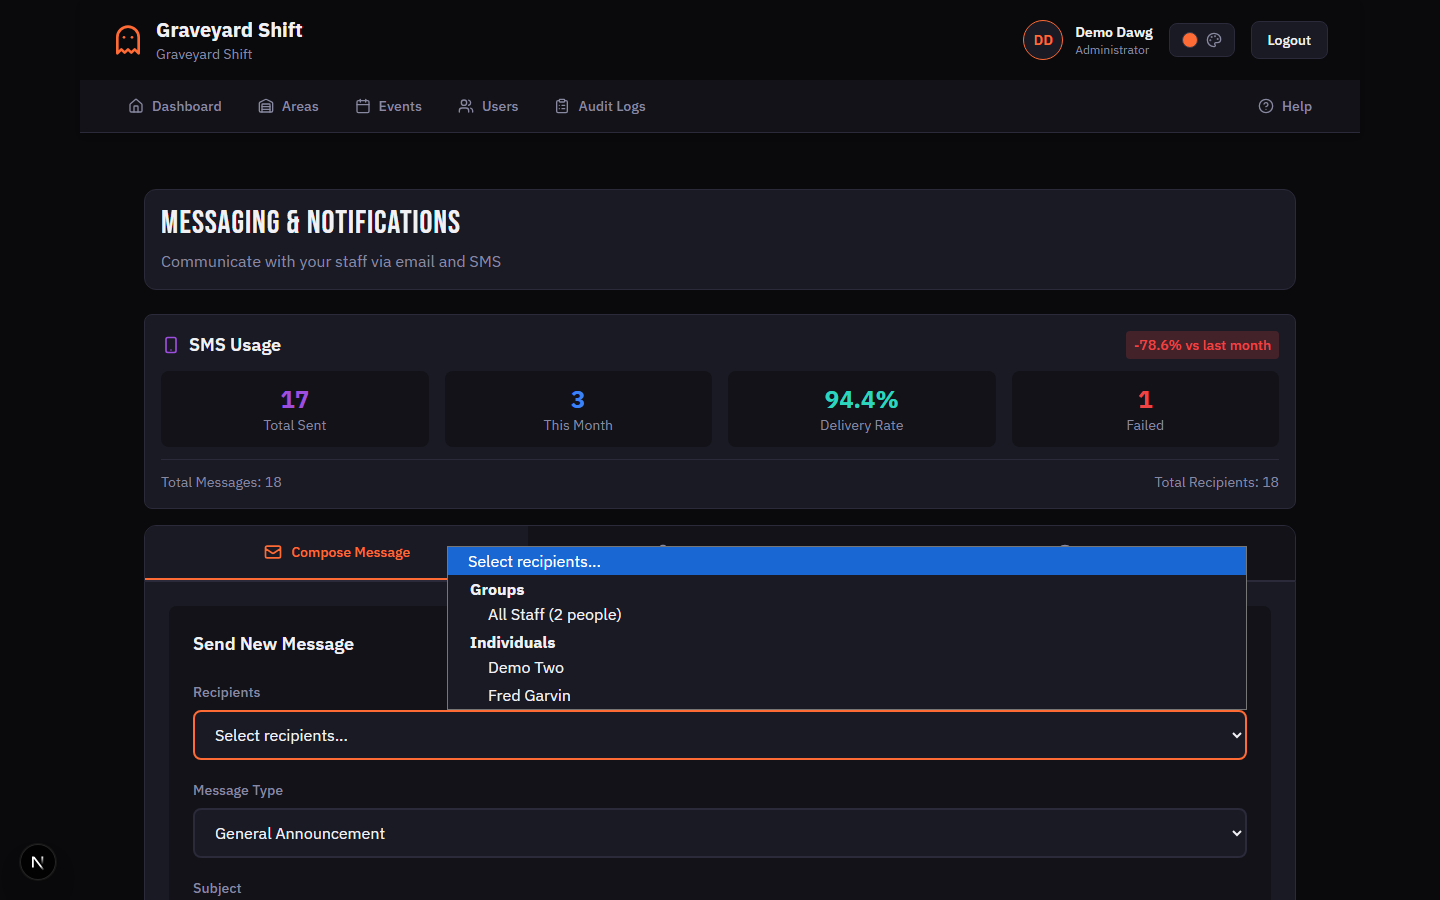
Select recipients
Use the Recipients dropdown to choose who should receive the message. The dropdown is organized into two groups: Groups (such as All Staff) and Individuals (listed by name). Select a recipient from the dropdown and a pill chip appears below the field. You can add multiple recipients by selecting from the dropdown again. To remove a recipient, click the X button on their chip.
Choose a message type
Select a Message Type from the dropdown. Choosing a type auto-populates the Subject and Message fields with a template. You can edit the auto-populated content freely. Available types are General Announcement, Schedule Notification, Shift Reminder, Emergency Alert, and Custom Message.
Write your subject and message
Enter the email subject line in the Subject field. Write or edit the message body in the Message text area. If you selected a template in the previous step, both fields are pre-filled but fully editable.
Select delivery channels
Under Send Via, check the channels you want to use. Email is checked by default. Check SMS to also send a text message. When SMS is enabled, an additional SMS Message field appears with a character counter and segment indicator. The SMS content is auto-generated from the main message but can be overridden.
Send or schedule the message
Click Send Now to deliver the message immediately. Alternatively, click Schedule Later to open the scheduling modal where you pick a future date and time. Click Preview to see how the message will look before sending.
Compose Message Fields
| Field | Required | Description |
|---|---|---|
Recipients | Yes | One or more recipients or groups. Select from All Staff, event-based groups, area-based groups, position-based groups, or individual employees. At least one recipient is required. |
Message Type | No | Selects a pre-built template to auto-populate the Subject and Message fields. Options: General Announcement, Schedule Notification, Shift Reminder, Emergency Alert, Custom Message. |
Subject | Yes | The email subject line. Required when the Email channel is selected. Pre-populated by the selected template but fully editable. |
Message | Yes | The main message body. Used as the email content and, if no SMS override is provided, truncated to 160 characters for the SMS channel. |
Send Via (Email) | No | Checkbox to send via email. Checked by default. Requires the Subject field to be filled in. |
Send Via (SMS) | No | Checkbox to send via SMS. When checked, an SMS Message override field appears. SMS is only delivered to employees who have opted in to SMS notifications and have a phone number on file. |
SMS Message | No | Optional override for the SMS text. Auto-generated from the main Message content (truncated to 160 characters). You can manually edit this field. A character counter and segment indicator show the current length and cost impact. |
Recipient Selection
The Recipients dropdown organizes available recipients into two sections: Groups and Individuals. When you select a recipient from the dropdown, a pill-shaped chip appears below the field showing the recipient name. You can add as many recipients as needed by selecting from the dropdown multiple times.
To remove a recipient, click the X icon on their chip. The system deduplicates recipients automatically -- if a person belongs to multiple selected groups, they receive the message only once.
Recipient Groups
| Field | Required | Description |
|---|---|---|
All Staff | No | Sends to every approved employee in your company. Only employees with an approved application status are included. |
Event Group | No | Sends to all employees assigned to shifts for a specific event or event date. Useful for event-night communications. |
Area Group | No | Sends to all employees assigned to positions within a specific area. Useful for area-specific announcements or instructions. |
Position Group | No | Sends to all employees assigned to a specific position. Useful for role-specific instructions like costume reminders. |
Individual | No | Sends to a single employee selected by name from the dropdown. You can combine multiple individuals in one message. |
Email vs SMS
You can send messages via email, SMS, or both simultaneously. Each channel has different characteristics that affect how you compose your message.
Email Channel
Email messages are sent to the address associated with each employee's identity account. Emails include a formatted HTML layout with a branded header, subject line, and the full message body. There is no character limit for email content. A Subject field is required when the email channel is selected.
SMS Channel
SMS messages are sent to the phone number on each employee's profile. SMS delivery requires two conditions: the employee must have a phone number on file, and they must have opted in to SMS notifications in their profile settings. Employees who do not meet both conditions are silently skipped for the SMS channel.
SMS Character Limits and Segments
A single SMS segment holds 160 characters when using the standard GSM-7 character set (basic Latin letters, numbers, and common punctuation). If your message contains special characters or emoji outside the GSM-7 set, the system switches to Unicode encoding which reduces the limit to 70 characters per segment.
Messages longer than one segment are automatically split into multiple segments. Multi-segment messages use a slightly smaller per-segment limit (153 characters for GSM-7, 67 for Unicode) because of the concatenation header overhead. The compose form displays a real-time character counter, segment count, and a color-coded progress bar:
- Green -- 1 segment. Fits within a single SMS message.
- Yellow -- 2 segments. Slightly higher delivery cost.
- Red -- 3 or more segments. Consider shortening the message.
When SMS is enabled, a separate SMS Message field appears below the main message body. By default, it auto-generates a truncated version of the main message (limited to 160 characters). You can manually override this field to write a shorter, SMS-specific version. Click Reset to auto to regenerate the SMS content from the main message.
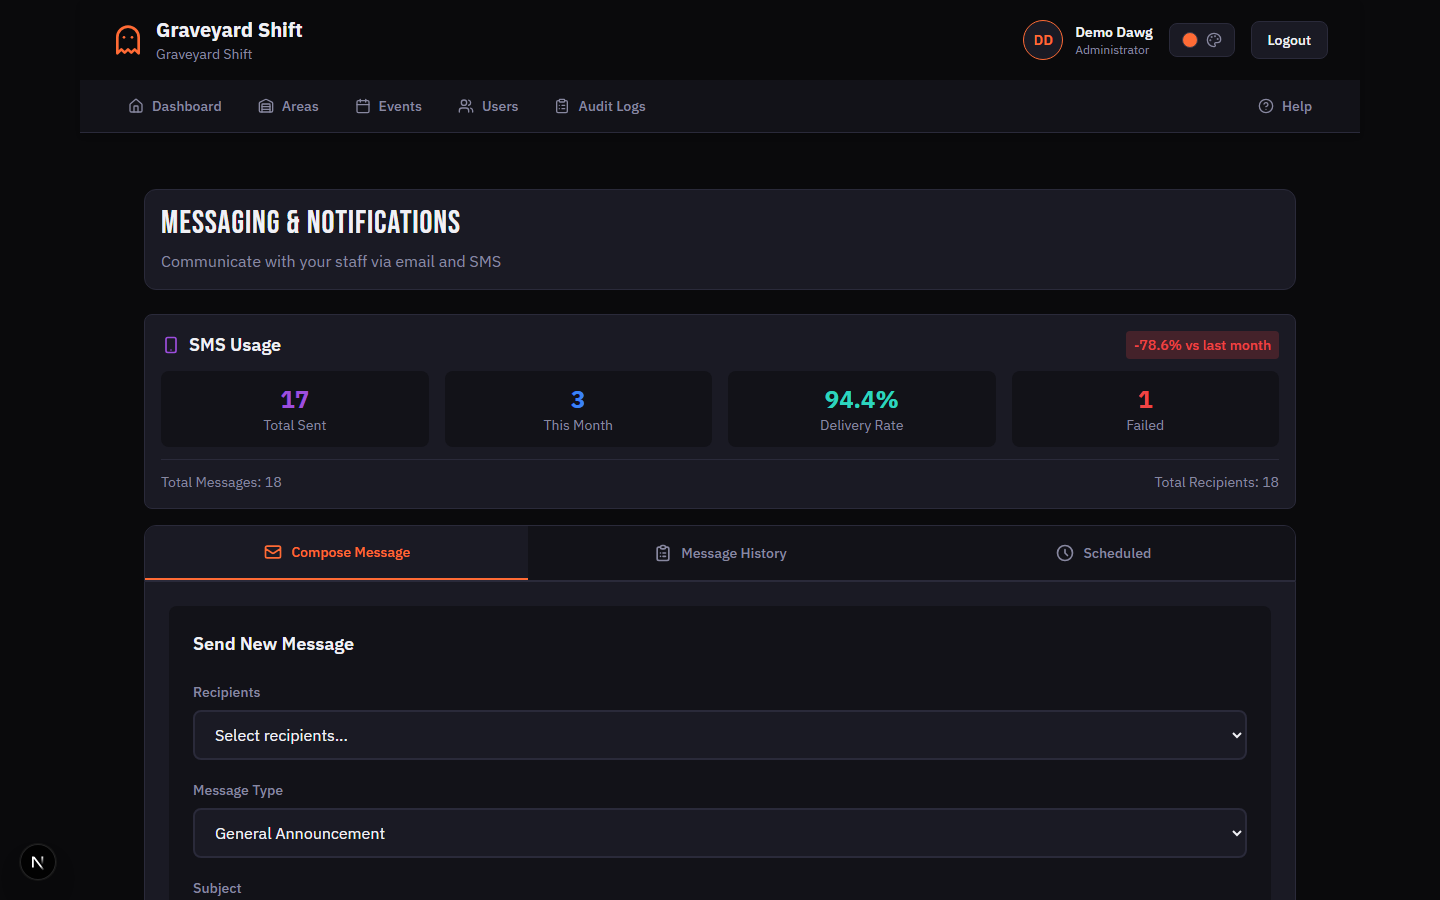
SMS Usage Statistics
An SMS Usage card appears at the top of the Messaging page showing your current statistics: total messages sent, messages this month, delivery rate percentage, and failed count. A month-over-month trend indicator shows whether your SMS usage is increasing or decreasing compared to the previous month.
Message Templates
The Message Type dropdown provides pre-built templates that auto-populate the Subject and Message fields. This speeds up common communications and ensures consistent messaging across your team.
Available Templates
- General Announcement -- Sets the subject to "Important Announcement" and provides a general-purpose message body. Best for company-wide updates that do not relate to a specific shift or event.
- Schedule Notification -- Sets the subject to "Your Work Schedule" and includes a message directing employees to check their dashboard. Use this when publishing or updating schedules.
- Shift Reminder -- Sets the subject to "Shift Reminder" with a brief reminder that the employee is scheduled to work. Ideal for day-of-event reminders.
- Emergency Alert -- Sets the subject to "URGENT: Emergency Update" and provides an urgent-tone message body. Use for weather closures, safety alerts, or last-minute cancellations.
- Custom Message -- Leaves the Subject and Message fields blank so you can write everything from scratch.
When you select a template, the Subject and Message fields are immediately updated. You can freely edit the auto-populated content before sending. If SMS is enabled, the SMS Message field also updates automatically with a truncated version of the new template content.
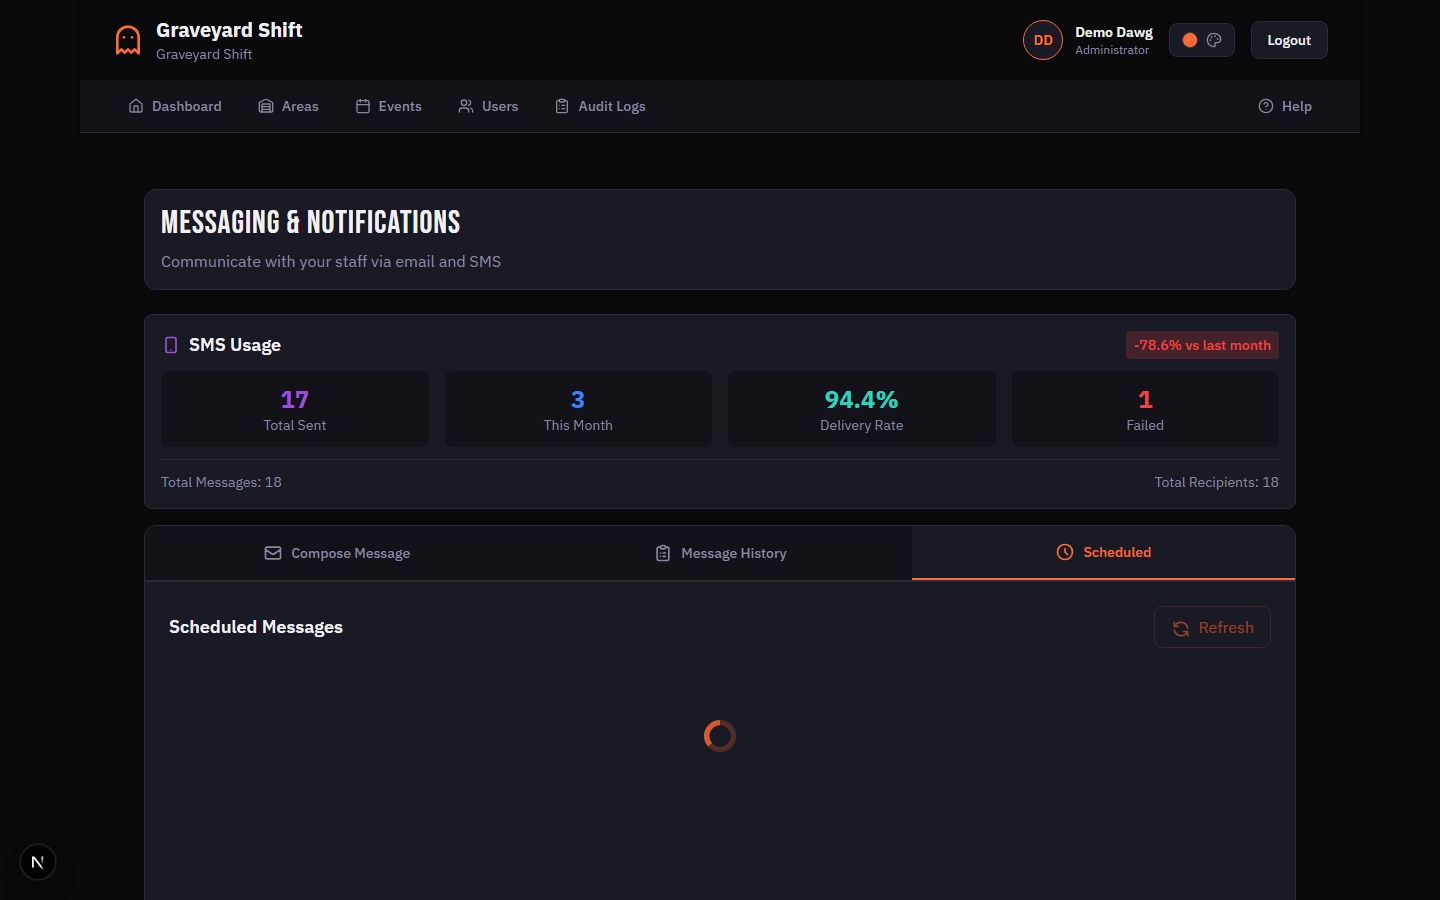
Scheduled Messages
Instead of sending a message immediately, you can schedule it for a future date and time. This is useful for pre-planning communications like morning-of reminders or next-day schedule announcements.
Compose your message
Fill in the recipients, message type, subject, content, and channels as described in the Composing a Message section above.
Click Schedule Later
Click the Schedule Later button. A modal dialog opens with a date picker and a time picker.
Pick a date and time
Select a future date using the date picker. The picker prevents you from choosing dates in the past. Then select the delivery time. The scheduled time must be in the future or the system will show a validation error.
Confirm the schedule
Click Confirm Schedule to queue the message. A confirmation banner appears showing the number of recipients the message will be delivered to. The message appears in the Scheduled tab where you can view, edit, or cancel it before the delivery time arrives.
Managing Scheduled Messages
The Scheduled tab lists all pending scheduled messages and automated reminders. Each entry shows the subject, number of recipients, scheduled delivery time, and a countdown badge (e.g., "in 3 days", "in 2 hours").
For manually scheduled messages, you can perform three actions:
View Details-- Opens a modal showing the full message content and recipient list.Edit-- Opens an edit modal where you can change the subject, message content, and delivery date/time. Recipients cannot be modified after scheduling.Cancel-- Cancels the scheduled message after a confirmation dialog. Cancelled messages are not sent and cannot be restored.
Automation Rules
Graveyard Shift includes four built-in automation rules that send messages to your staff automatically based on schedule events. These rules are created with default settings when your company account is set up. Each rule can be enabled or disabled independently.
Automation Rules
| Field | Required | Description |
|---|---|---|
Daily Work Reminders | No | Sends each scheduled employee a reminder on the morning of their shift. Default message template includes the employee name, position, and shift time. Default send time is 10:00 AM. |
2-Hour Shift Warnings | No | Sends a heads-up two hours before an employee's shift starts. Includes the area name and shift start time. Checks every 30 minutes for upcoming shifts. |
Attendance Confirmations | No | Sends a confirmation request 24 hours before a shift asking the employee to confirm they will attend. Employees can reply YES or NO. |
No-Show Alerts | No | Sends an alert to admins 15 minutes after a shift starts if the employee has not clocked in. Includes the employee name and position for rapid follow-up. |
Message Templates in Automation Rules
Each automation rule has a customizable message template. Templates support placeholder variables that are replaced with real values when the message is sent:
{name}-- The employee's full name.{position}-- The position the employee is assigned to.{time}-- The shift start time.{area}-- The area where the position is located.{hours}-- The number of hours before the shift (used in shift warnings).
Availability Reminders
In addition to the four automation rules, the system automatically schedules availability reminders when an event is published. Reminders are sent at 7 days, 3 days, and 1 day before the first event date to employees who have not yet submitted their availability. These reminders are sent via in-app notification and, depending on the employee's notification preferences, via email and/or SMS.
Availability reminders only go to employees who are assigned to positions in the event's active areas and have not yet submitted their availability. Employees who have already submitted are automatically excluded.
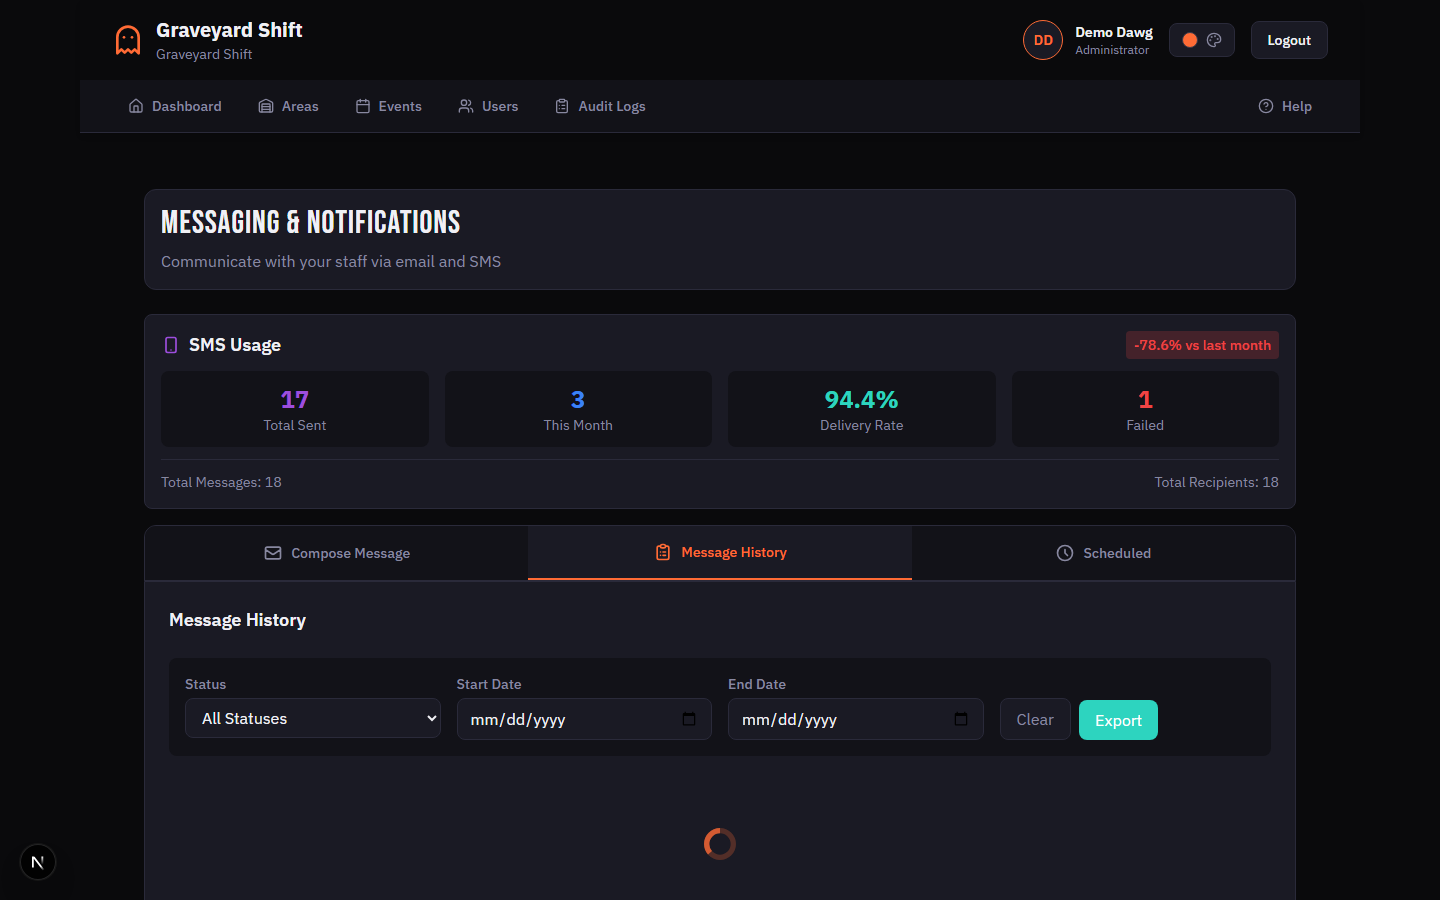
Message History and Analytics
The Message History tab shows all messages that have been sent from your account. Each message card displays the subject, recipient count, send date, delivery channel badges (Email and/or SMS), and an overall delivery status badge.
Delivery Status Tracking
Each message tracks per-recipient delivery status with four possible states:
- Pending -- The message has been queued but not yet sent.
- Sent -- The message was sent to the delivery service.
- Delivered -- Delivery was confirmed by the email or SMS service.
- Failed -- The message could not be delivered. This can happen due to invalid email addresses, disconnected phone numbers, or service errors.
Click on any message in the history list to open a detail modal showing the full message content and a per-recipient breakdown with individual delivery statuses.
Filtering and Export
Use the filter bar at the top of the Message History tab to narrow results. You can filter by delivery status (Sent, Delivered, Failed, Pending), start date, and end date. Click Clear to reset all filters.
Click Export to download your message history as a CSV file. The export respects any active filters, so you can export a specific date range or status subset. Paginated results show the current page count and total message count.
Best Practices
- Keep SMS messages under 160 characters. Single-segment messages are delivered faster and cost less. Use the SMS Message override field to write a concise version of your message rather than letting the system truncate the email content.
- Use templates for recurring communications. The built-in templates ensure consistent formatting and tone. Start with a template and customize it rather than writing from scratch each time.
- Schedule messages for optimal timing. Morning-of reminders work best when sent around 10:00 AM, giving staff enough time to prepare without being too early. Last-minute schedule changes should use the Send Now option to ensure immediate delivery.
- Use group selectors for efficiency. Instead of selecting employees one by one, use the Event, Area, or Position group selectors to reach the right audience in a single action. The system deduplicates automatically if an employee belongs to multiple selected groups.
- Keep automation rules enabled. The default automation rules (daily reminders, shift warnings, attendance confirmations, no-show alerts) significantly reduce no-shows and last-minute surprises. Only disable them if you have an alternative communication workflow in place.
Troubleshooting
Employee did not receive SMS
SMS messages are only delivered to employees who meet two conditions: they must have a valid phone number on their profile, and they must have opted in to SMS notifications. Ask the employee to check their profile settings and confirm that SMS notifications are enabled. Also verify that the phone number on file is correct and in service. If both conditions are met and the message still was not delivered, check the message detail in Message History to see if the recipient status shows "Failed".
Emails going to spam
If employees report that messages are landing in their spam or junk folder, ask them to add the sending email address to their contacts or safe-sender list. Most email providers will stop filtering messages from recognized contacts. If the problem persists across many employees, check with your email administrator to ensure your domain's SPF and DKIM records are properly configured.
Automated reminders not sending
Verify that the automation rule is enabled. Go to the automation rules configuration and check that the rule has its toggle set to enabled. Also check that the event has published dates and that employees are assigned to positions in the event's active areas. Availability reminders are only sent to employees who have not yet submitted their availability -- if everyone has already submitted, no reminders will be sent.
How to send a last-minute schedule change
For urgent communications, go to the Compose Message tab, select the Emergency Alert template (which sets an urgent subject line), choose your recipients, check both Email and SMS channels for maximum reach, and click Send Now. Avoid using Schedule Later for urgent messages since any delay could cause staff to miss the update.